📊 Multilingual Notebooks: A Polyglot's Playground
A walk through of the steps installing MATLAB, R and Julia kernels for Jupyter notebooks, with some gotchas you may encounter along the way.
Jupyter notebooks are an amazing way of keeping track of programming pipelines and for learning concepts through programming. It is also a great way to recall how you may have done something before, or solved a problem previously (Bishop, 2006)1
I have been using Jupyter notebooks (previously know as the IPython notebook) for a while but only for use with Python 2.7 programming language. Following a brilliant Coursera course on Julia Scientific Programming, I discovered that there has been a push to make these notebooks agnostic to language. There are several kernels available at the moment for a multitude of languages including Julia, R, Ruby and so on, a full list of which can be found here. This post will talk though the steps involved to install the MATLAB, R and Julia kernels.
MATLAB
MATLAB (matrix laboratory) is ubiquitous in the world of scientific computing and is a many engineering and physics students only connection to programming. The brilliant abstraction away from the low-level implementation of LAPACK under the hood with a nice high level interface make MATLAB a very powerful and useful tool. Combine that with the Jupyter notebook and we now have a way of expressing complex mathematical concepts and doing compute numerical methods in an easy to read manner.
To get started one needs to have MATLAB installed on their local machine. MATLAB is propriety software from the mathworks company but if you are affiliated with a university a license should be easy to come by. After the binary is installed, one needs to install the MATLAB engine for Python, instructions for downloading can be found here. The system requirements for these installs can be found here.
Historical Note (2016): At the time of original writing, MATLAB's Python engine had compatibility issues with Python 3.5, requiring Python 3.4. Modern MATLAB versions (R2020a onwards) support Python 3.7, 3.8, 3.9, 3.10, and 3.11 depending on your MATLAB version. Always check the current compatibility matrix for your MATLAB release.
The original error encountered in 2016 was:
OSError: MATLAB Engine for Python supports Python version 2.7, 3.3 and 3.4, \
but your version of Python is 3.5
At the time, it was necessary to create a new environment under Python 3.4 using conda like so;
conda create -n py34 python=3.4 anaconda
source activate p34
Then, open up MATLAB and type in:
cd "matlabroot/extern/engines/python"
python setup.py install
This will install the MATLAB engine for Python. Following that we need to ensure a few dependencies are also installed.
pip install --upgrade pip
pip install jupyter
pip install pymatbridge
pip install matlab_kernel
python -m matlab_kernel install
One may encounter the following error, this can be resolved by doing the following:
conda remove pyzmq && pip install pyzmq
Once all of these steps have been completed, you should be able to start a new Jupyter notebook with a MATLAB kernel like so:
jupyter notebook
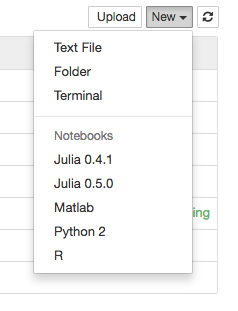
Then in the notebook, select MATLAB from the 'New' menu in the top right hand corner. Alternatively, from the command line, one can simply run:
jupyter console --kernel matlab
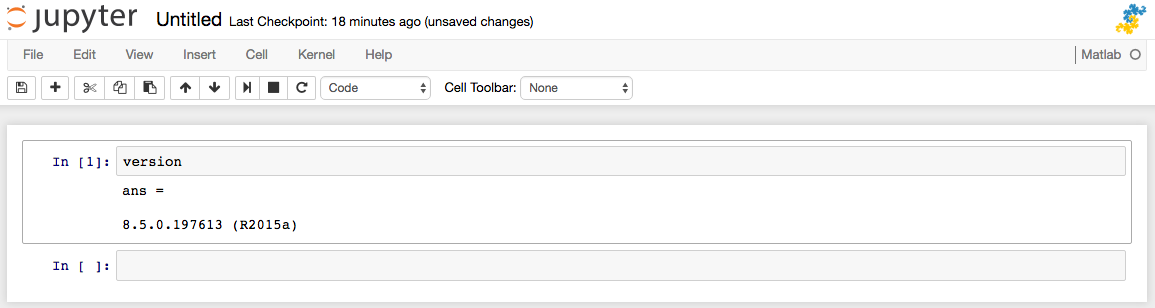
MATLAB kernel
R
R, the successor to S, is a statical programming language. Unlike MATLAB, R is an open source language that has now been around for over 20 years. Over that time, it established itself as the language of choice for mathematical statistician and is widely used today. Although slower that the other two languages mentioned here, it is a highly expressive language and the DataFrame concept is one that has influences many other modern languages (Pandas - Python, DataFrames - Julia etc).
The R kernel is fairly simple to download and install via conda package manager, and I would recommend going through this useful article. Unfortunately I discovered that article after the fact, which meant I had to jump over a few hurdles in attempting to get things working on my machine. I will go through the steps I took installing without using conda package manager as it might be useful for people not using conda, but I would recommend if you are, the definitely follow the article I have listed above.
Since I already has R installed on my machine, I didn't feel it necessary to re-download r-essntials from conda so I followed the instructions on the IRKernel GitHub readme which instructed me to install the relevant dev tools from within R like so:
install.packages(c('repr', 'IRdisplay', 'crayon', 'pbdZMQ', 'devtools'))
devtools::install_github('IRkernel/IRkernel')
IRkernel::installspec()  # to register the kernel in the current R installation
Error in curl::curl_fetch_memory(url, handle = handle) :
Peer certificate cannot be authenticated with given CA certificates
library(httr)
set_config( config( ssl_verifypeer = 0L ) )
After installing I received the following error:
$ which R
/Users/me/anaconda/bin/R

$ /Users/me/anaconda/bin/R
dyld: Library not loaded: \@rpath/libpcre.1.dylib
  Referenced from: /Users/me/anaconda/lib/R/lib/libR.dylib
  Reason: image not found
Trace/BPT trap: 5
I was able to search for the libpcre.1.dylib file by using the brilliant find command like so:
find / -iname "libpcre.1.dylib"
Alternatively one can use fzf fuzzy finder by changing directory to / and running fzf. Once inside the program, simply type: libpcre.1.dylib and it should search for you (this may take a while)
Finally, the last step was to make Jupyter see the newly installed kernel by entering the following withing R:
# in R 3.3
IRkernel::installspec(name = 'ir33', displayname = 'R 3.3')
# in R 3.2
IRkernel::installspec(name = 'ir32', displayname = 'R 3.2')
IRkernel::installspec(user = FALSE)
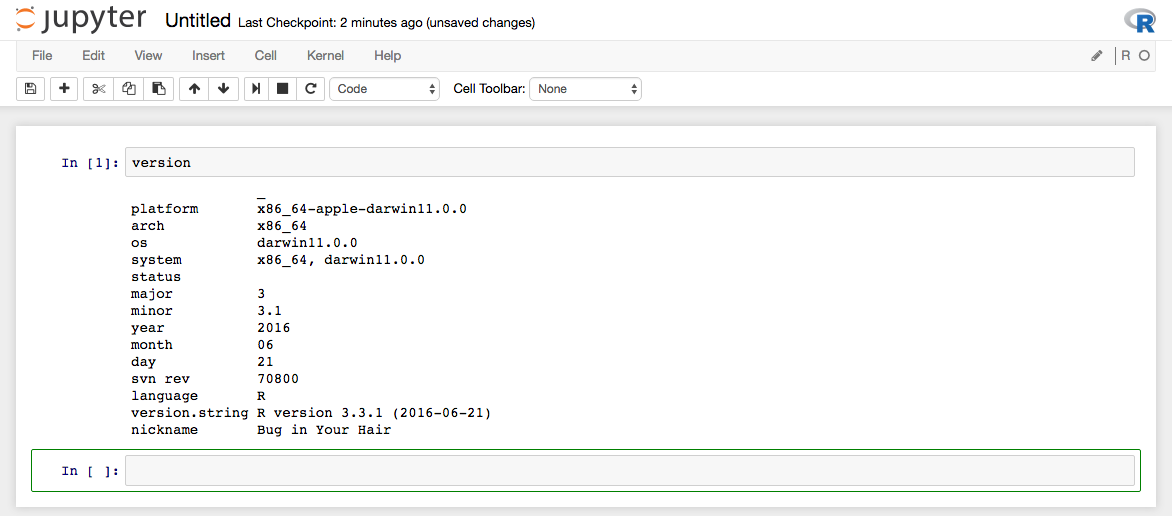
R kernel
Julia 
Julia is a relatively new programming language designed to be a modern scientific programming language for the 21st century.
Here is a good guide to get up and running quickly.
Julia was definitely the easiest out of the three kernels mentioned here. All that is required is a Julia to be downloaded at version 0.4 or greater on your laptop and to run the following commands from within Julia:
Pkg.add("IJulia")
using IJulia
notebook()
There were a few gotcha I did encounter, the main one being trouble with several plotting packages with Julia.0.5.0 (14-11-2016). I reverted back to Julia 0.4.6 and everything seems to work. I am sure this is only a temporally issue and will be resolved soon.
Another hiccup once might have may relate to this issue of the kernel failing to start (Note, this is the same issue mentioned above for the MATLAB kernel)
conda remove pyzmq
pip install pyzmq
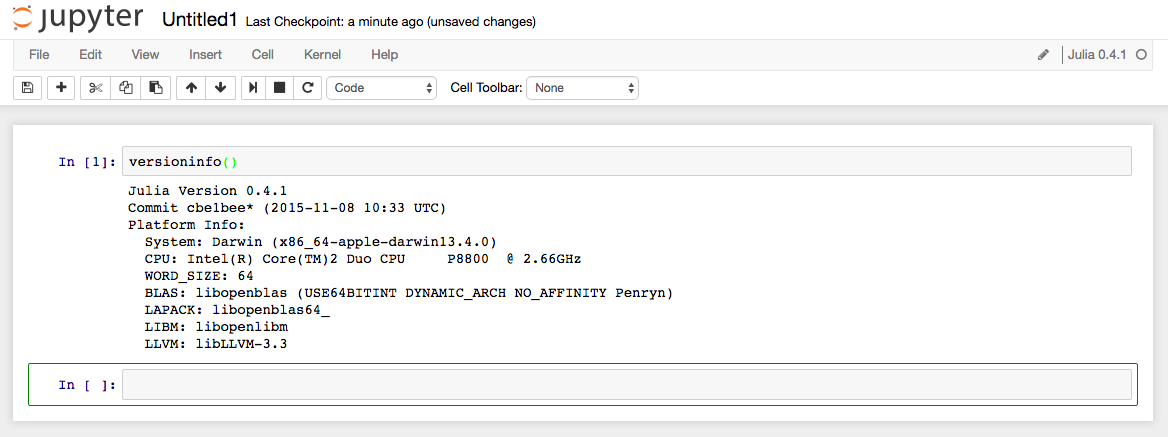
Julia kernel
Final Comments.
I have focused on installing the kernels I felt most useful for Scientific Computing, however a list of other kernels can be found here. Jupyter project is doing wonders in helping many people learn programming and also the research community with sharing code and methodology. I hope this can continue and if you have read this and also think it's awesome, you can find out more on their website. Since Jupyter is an open source project you can always contribute on GitHub, or in other ways through donations!
-
Bishop CM (2006) Pattern Recognition and Machine Learning. Springer. ↩